Posts tagged ‘Dessert’

June 20, 2011

Strawberry Rhubarb Crumble

Strawberry Rhubarb Crisp

I think I’ve mentioned several times in this blog that my husband adores strawberry-rhubarb…well anything. Given that both fruit are in season right now, and that our 5 year anniversary is coming up in a few weeks, I feel the necessity to spoil him rotten by cooking / baking all of his favorite foods. This strawberry rhubarb crumble is a perfect individual dessert that isn’t overly heavy and doesn’t leave you starved. Also, the recipe makes four crumbles, just enough to leave two in the refrigerator for later snacking. Yum!

Strawberry-Rhubarb Crumble

Yields 6 to 8 servings.

For the topping:
1 1/3 cup flour
1 teaspoon baking powder
3 tablespoons sugar
3 tablespoons Demerara sugar (or turbinado sugar aka Sugar in the Raw)
Zest of one lemon
1/4 pound (1 stick or 4 ounces) unsalted butter, melted

For the filling:
1 1/2 cups rhubarb, chopped into 1-inch pieces
1 quart strawberries plus a few extras, hulled, quartered
Juice of one lemon
1/2 cup sugar
3 to 4 tablespoons cornstarch (some commenters found the flour option a little too, well, floury so this has been updated)
Pinch of salt

1. Heat oven to 375°F. Prepare topping: In a mixing bowl, combine flour, baking powder, sugars and lemon zest and add the melted butter. Mix until small and large clumps form. Refrigerate until needed.

2. Prepare filling: Toss rhubarb, strawberries, lemon juice, sugar, cornstarch and a pinch of salt in a 9-inch deep-dish pie plate. (I used an oval dish this time, because they fit better in the bottom of a shopping bag.)

3. Remove topping from refrigerator and cover fruit thickly and evenly with topping. Place pie plate on a (foil-lined, if you really want to think ahead) baking sheet, and bake until crumble topping is golden brown in places and fruit is bubbling beneath, about 40 to 50 minutes.

May 5, 2011

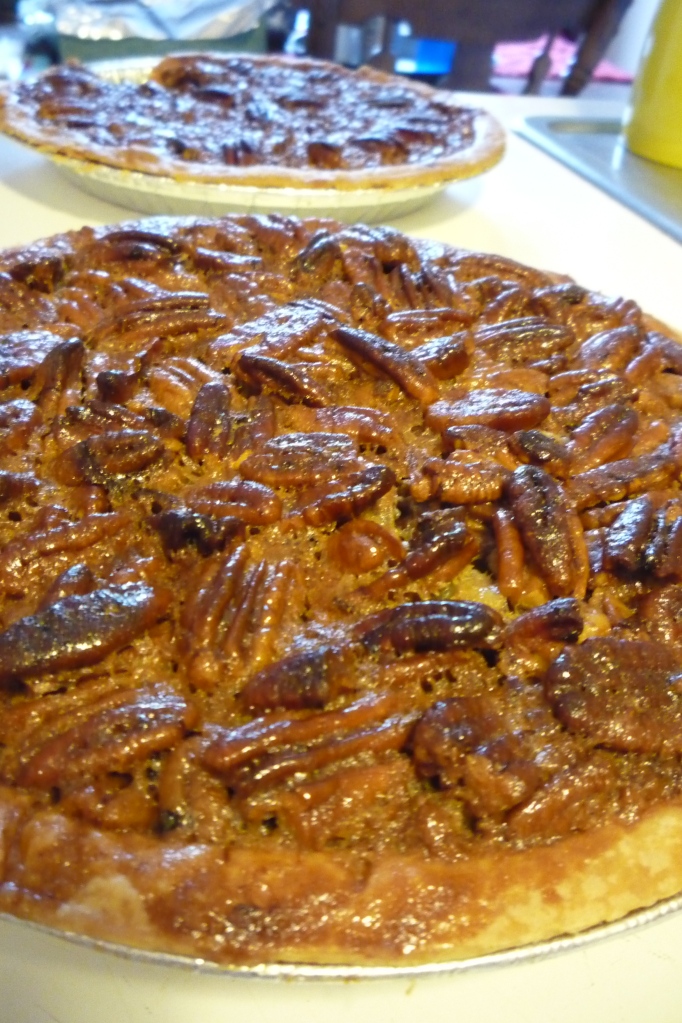
A Tale of Two Pecan Pies

2 Pecan Pies

Yes, I know it’s not the ‘season’ for pecan pie, but when I found out that it was my good friend Bree’s birthday last week and that pecan pie is her absolute favorite dessert, I just had to make it. Never mind that I had never made pecan pie before, much less tasted pecan pie, but I was pretty determined to make a good one! One problem that I’ve always had with pecan pie is that my husband is deathly allergic to nuts, so I try to avoid using them in the kitchen. However, since we’re moving this weekend, I figured that a few pecans in a kitchen that we would no longer be using couldn’t kill him (right?).

I had planned to only make one pecan pie (recipe #1), but when I took it out of the oven, it just didn’t look right. I had followed the instructions to a tee, but it looked like it may have been slightly overbaked. Being a bit of a perfectionist, I knew I couldn’t bring a dried out pie to a friend’s birthday, so I searched for a second recicpe, and thus found recipe #2. Following this one’s directions carefully, I came out with a much lighter looking pie. I ended up taking both to Bree’s house for a ‘pie taste test’. Her husband actually preferred the first recipe pie and Bree preferred the second, so I guess there really was no clear winner, but they both said the pies were great. My recommendation if you’re making the first recipe is to keep a close eye on it if you don’t want an overly dark pie. Otherwise, enjoy!

Pecan Pie #1

Ingredients

1 stick butter
1 cup sugar
1 cup Karo corn syrup
3 eggs, beaten
1 cup chopped pecans
1 unbaked 9 inch pie shell (I used the pie dough from this recipe)

Directions

Preheat oven to 350 degrees F.
In a saucepan, melt the butter, but don’t let it brown. Mix in the sugar and corn syrupand cook, stirring, over medium heat until the sugar dissolves.
Stir in the eggs. Mix well. Stir in the pecans.
Pour into the pie shell and bake for 1 hour or until firm when shaken.

Source: Sara’s Secrets – Food Network

Pecan Pie #2

Ingredients:
1 unbaked 9 inch pie shell (I used the pie dough from this recipe)
4 large eggs
1 cup light corn syrup
1/3 cup packed light-brown sugar
1/4 cup granulated sugar
4 tablespoons unsalted butter, melted
1 teaspoon vanilla extract
1/2 teaspoon salt
3 cups pecan halves

Directions:
Preheat oven to 375 degrees. with rack set in lowest position.
Using kitchen shears or a paring knife, trim dough to a 1-inch overhang. With floured fingers, fold overhang under itself to form a rim; pinch between thumb and forefinger to form a uniform edge around rim of pie plate. Crimp with fingertips. Transfer dough-lined pie plate to refrigerator.
Make filling: In a large bowl, whisk eggs, corn syrup, sugars, butter, vanilla, and salt until smooth; mix in pecans. Pour mixture into chilled pie crust; place pie plate on a rimmed baking sheet. Bake until filling jiggles slightly in the center when gently shaken, 50 to 60 minutes.
Cool pie completely in plate, 5 to 6 hours. Serve with whipped cream, if desired.

Source: Martha Stewart

April 25, 2011

Flourless Chocolate Cake

Flourless Chocolate Cake

I know Passover is almost over, but I just had to end it with a something absolutely delicious, and this cake is definitely that. It’s rich and has almost a fudge-like quality.

Almost every year, Easter falls during Passover, which wouldn’t be such a big deal except that my husband’s family always has a big Easter party with amazing food and amazing desserts…most of which I can’t eat. This year, I decided to allow myself to indulge in some of the celebration by making this flourless chocolate cake. With only three ingredients, it was a breeze to make and great for someone (like me) whose kitchen is mostly packed up in boxes (did I mention we’re moving into our first house in 2 weeks?).


Flourless Chocolate Cake

Ingredients
8 large eggs, cold
1 lb. semisweet (or bittersweet) chocolate, coarsely chopped
16 Tbsp. (2 sticks) unsalted butter, cut into 16 pieces
Optional toppings: Confectioners sugar and/or berries

Directions:

Adjust an oven rack to the lower-middle position and heat the oven to 325 degrees.
Line the bottom of an 8-inch springform pan with parchment paper or waxed paper and grease the sides of
the pan. (Be sure to grease the sides really well!)
Wrap the outside of the pan with 2 sheets of heavy-duty aluminum foil and set it in a large roasting pan. Bring a kettle or pot of water to boil.
In a stand mixer using the whisk attachment, beat the eggs at high speed until the volume doubles (5-10 minutes).
Meanwhile, melt the chocolate and butter together in a heatproof bowl over a simmering pot of water until the chocolate reads 115 degrees on an instant-read thermometer – stirring occasionally.
Fold about a third of the beaten eggs into the chocolate mixture using a large rubber spatula until only a few streaks of egg are visible.
Fold in half of the remaining egg foam, and then the last half of the foam, until the mixture is totally homogenous.
Scrape the batter into the prepared springform pan and smooth the surface with a rubber spatula. Place the roasting pan on the oven rack and pour in enough boiling water to come about halfway up the sides of the springform pan. Bake until the cake has risen slightly, the edges are just beginning to set, a thin-glazed crust has formed on the surface, and an instant-read thermometer inserted halfway into the center reads 140° F, 22-25 minutes.
Remove the springform pan from the water bath and set on a wire rack; cool to room temperature. Cover and refrigerate overnight to mellow and firm. (The cake can be refrigerated for up to 4 days.)
About 30 minutes prior to serving, carefully remove the sides of the springform pan, invert the cake onto a sheet of waxed paper, peel off the parchment paper, and reinvert the cake onto a serving platter.
Lightly dust the cake with powdered sugar and top with berries. To slice, use a sharp, thin-bladed knife, dipping the knife into a pitcher of hot water and wiping the blade before each cut.

Source: Gimme Some Oven! , Originally from Cooks Illustrated

April 22, 2011

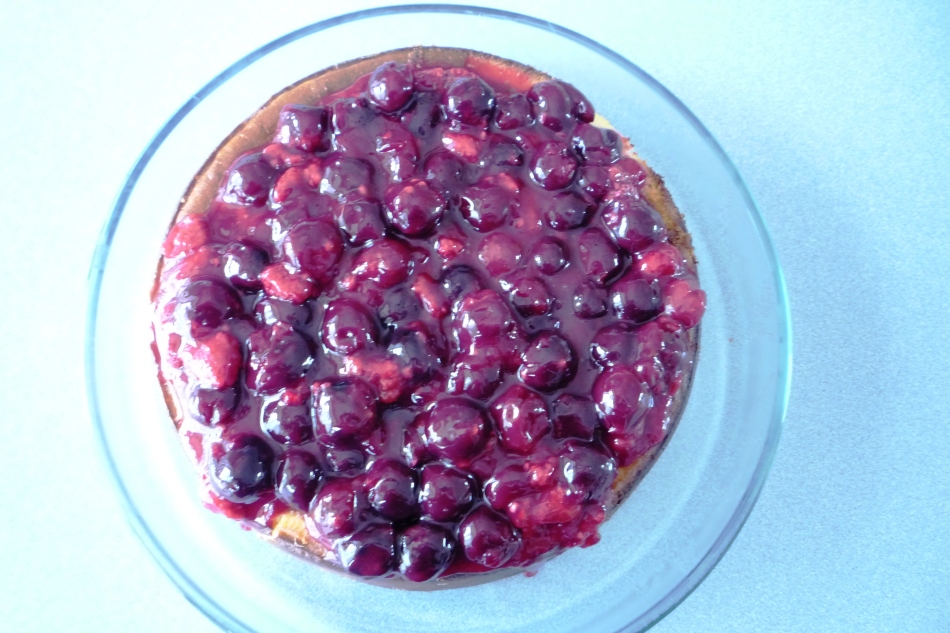
New York Cheesecake with Cherry-Raspberry Topping

New York Style Cheesecake

Don’t let the bad photography skills fool you. This cake is truly amazing. Ever since I made the Raspberry Cheesecake-Cupcakes, my mother has been buying tons and tons of cream cheese ready for baking whenever I come to her house. A couple weekends ago, she asked me to use the cream cheese to create a decadent dessert for my father’s birthday, and of course, the most decadent cheesecake dessert that I could  think of was tall, rich, gorgeous (kind of sounds like I’m describing a man huh?) New York Style Cheesecake.

This cake is truly as great as people make it out to be. Guests were very much impressed by how delicious it was and most importantly, my dad loved it.

The recipe is from Baking Illustrated, which has never let me down, with a really great cherry-raspberry topping that I think I could have probably eaten plain. This one is definitely a keeper.

New York Cheesecake

Ingredients:

Graham Cracker Crust:
5 Tbsp unsalted butter, melted, plus 1 Tbsp melted unsalted butter for greasing the pan
4 ounces Graham crackers, broken into rough pieces and processed in a food processor to fine, even crumbs (approximately 8.5 crackers)
1 Tbsp sugar

For the filling:
2 1/2 lbs (five 8oz packages) cream cheese cut into rough 1 inch chunks at room temperature
1/8 tsp salt
1 1/2 cups sugar
1/3 cup sour cream
2 tsp lemon juice
2 tsp vanilla extract
2 large egg yolks plus 6 large eggs at room temperature.

Directions:
For the crust: Adjust an oven rack to the lower-middle position and heat the oven to 326 degrees.
brush the bottom and sides of a 9-inch springform pan with 1/2 Tbsp of the melted butter.
Combine the graham cracker crumbs and sugar in a medium bowl.
Add 5 Tbsp of the melted butter and toss with a fork until evenly moistened.
Empty the crumbs into the springform pan and press evenly into the pan bottom using the bottom of a ramekin, 1 cup measuring cup or drinking glass to press the crumbs into the bottom. Use a teaspoon to press the crumbs into the corners of the pan.
Bake until fragrant and beginning to brown around th edges, about 13 minutes.
Cool on a wire rack while making the filling.
For the filling: increase the oven temperature to 500 degrees.
In a standing mixer, beat the cream cheese at medium-low speed to break up and soften it slightly, 1 minute.
Scrape the beater and the bottom and sides of the bowl with a rubber spatula.
Add the salt, half of the sugar and beat at medium-low speed until combined, about 1 minute.
Scrape the bowl once again.
Beat in the remaining sugar until combined (about 1 minute).
Scrape the bowl with the rubber spatula again.
Add the sour cream, lemon juice and vanilla.
Beat at low speed until combined, one minute.
Scrape the bowl.
Add the egg yolks and beat at medium-low speed until thoroughly combined, about one minute. Scrape the bowl.
Add the remaining eggs, two at a time, beating until thoroughly combined, about one minute, scraping the bowl between additions.
Brush the sides of the springform pan with the remaining 1/2 Tbsp melted butter.
Set the springform pan on a rimmed baking sheet to catch any spills.
Pour the filling into the cooled crust and bake 10 minutes.
Without opening the oven door, reduce the oven temperature to 200 degrees and continue to bake until the cheesecake reads about 150 degrees on an instant-read thermometer inserted in the center, about 1 1/2 hours.
Transfer the cake to a wire rake and cool until barely warm, 2 1/2 to 3 hours.
Run a paring knife between the cake and the springform pan sides.
Wrap tightly in plastic wrap and refrigerate until cold, at least three hours. The cheesecake can be refrigerated up to four days.
To unmold, remove the sides of the pan. Slide a thin metal spatula between the crust and the bottom of the pan to loosen, then slide the cake onto a serving plate.
Let the cheesecake stand at room temp 30 minutes, then cut into wedges.

Cherry-Raspberry Topping

Ingredients:
15 ounces mix of frozen cherries and raspberries (this came in two separate bags)
2 tablespoons lemon juice
1/4 cup sugar
2 tablespoons cornstarch
1/2 cup water

Directions:
Place all ingredients together in a medium saucepan. Bring to a boil. Once it is boiling, cook it for an additional one to two minutes then remove from heat. Cool completely before covering cheesecake.

Source: Cheesecake:Baking Illustrated
Cherry/Raspberry Topping adapted from: Smitten Kitchen

Birdseye NY Style Cheesecake

April 4, 2011

Teddy Bear Cupcakes for a Teddy Bear Picnic


Teddy Bear Cupcakes

I know I’ve been on a bit of a hiatus, but honestly, it hasn’t been without good reason. We’ve had some major life-changing events in the past few weeks that have kept me pretty busy.

A short summary of the past few weeks for us:

– I ‘matched’ into a surgical residency position. This basically means that I got my first job! I know that I’ll have to work harder than I ever have in my life, but the way I look at it is that I’ll be doing exactly what I want to be doing (surgery)…I’ll just be doing a whole lot of it. So I’m thrilled to start this new stage in my medical education.

-My husband graduated from his MBA program in the top 20 percent of his class. For the past two years, he’s been working full time and doing a weekend MBA program and I am extremely proud of him for graduating and doing so well.

-We started looking for a home. This was so exciting at first, but it’s been a bit of a roller coaster. We lost one home to another offer and are now in a bidding war on another home. Maybe it’s some sort of first-time-home-buyers curse? Anyways, I’m hoping it works out.

So as you see, it’s been busy, but hopefully things will slow down a bit and I can actually update it now since I have lots of great recipes waiting to be posted.

These cupcakes were made together with my good friend and great baking buddy Bree (who I know I’ve mentioned several times in this blog). Her daughter turned one last weekend and since her nickname is Brynne Bear, Bree thought that it was most appropriate to throw her a teddy bear picnic. She actually found this recipe in the Jewish Chronicle Online (a bit random) but these were  so adorable a cinch to make. For the base cupcake, we used my favorite Hershey’s Perfectly Chocolate Cake batter…always a winner.The frosting wasn’t overly sweet, which was a perfect contrast to the cupcakes. The only catch with the frosting is that the directions were in grams and while this was not a problem for me (since I recently purchased a kitchen scale to make macarons with), I know that many people do not own a scale. Bree and I were having a bit too much fun baking, chatting and sipping wine that I didn’t think to count how much chocolate and butter 75 grams is, but I will definitely take note of this next time.  And the decorations? Well, I think they speak for themselves. Bree reported back that everyone was very impressed, especially the birthday girl.

Happy Birthday Brynne!

Teddy Bear Chocolate Cupcakes

For the cupcakes

Ingredients

2 cups sugar
1 3/4 cups all purpose flour
3/4 cups Hershey’s Cocoa
1 1/2 tsp baking powder
1 1/2 tsp baking soda
1 tsp salt
2 eggs
1 cup milk
1/2 cup vegetable oil
2 tsp vanilla extract
1 cup boiling water

Directions:
Preheat oven to 350 degrees. Line cupcake tins with liners.
Stir together sugar, flour, cocoa, baking powder, baking soda and salt in large bowl. Add eggs, milk, oil and vanilla; beat on medium speed of mixer 2 minutes.
Stir in boiling water (batter will be thin). Fill cups 2/3 full with batter. Bake 22 to 25 minutes. Cool completely. Frost.

For the frosting:

Ingredients:

75g semisweet baking chocolate
75g butter
2 tsp powdered sugar
pinch of salt

Directions:

Melt the chocolate in a heatproof bowl over a pan of warm water, then allow to cool for five minutes.
Beat the butter and sugar together with a pinch of salt, then beat in the cooled chocolate.
The icing will be very soft, so refrigerate for 20-30 minutes, stirring halfway through until firmer, but spreadable. Swirl the buttercream over the cakes using a palette knife.

For the decorations:

Ingredients:

Ready to roll white icing
Chocolate buttons
Chocolate M&Ms
Black writing icing

Directions:

Make small balls of white icing and flatten into oval shapes.
Place in the center of each cupcake and attach and M&M for the nose using a little of the writing icing.
Draw on a mouth using a tube of black writing icing and add chocolate buttons for ears and M&Ms for eyes.

Source: Hershey’s Perfectly Chocolate Cake , The Jewish Chronicle Online

February 21, 2011

Strawberry Rhubarb Pie


Strawberry Rhubarb Pie

I usually like to end the week with a sweet post, but given that I was post call last Friday, this post never made it to the Internet. Also, since we’re having round two of Midwest blizzard 2011, I thought a dessert post with fruit was in order to remind us that spring really will be here soon despite what the weather says (the groundhog said spring is coming, and he can’t possibly be mistaken right?).

My husband doesn’t like many desserts…in fact, he likes exactly two desserts: ice cream, and strawberry rhubarb pie. Every year, for his birthday, he asks for strawberry rhubarb pie. Easy request right? Not so much given that we live in the very cold and often snowy North where rhubarb doesn’t exist between November and March. A couple of years ago, my mother-in-law began giving me bags of rhubarb from her garden to freeze in the summer to make her son pie for his birthday, hence this strawberry-rhubarb pie post in February.

This is my tried and true recipe for strawberry rhubarb pie. I have been using it for quite a while and it makes a delicious pie that is not too sweet or too tart. Best of all? It gets the husband seal of approval.

Strawberry Rhubarb Pie

Ingredients

1 deep-dish 9 inch prepared pie crust (1/2 recipe of this basic pie dough)
4 cups (about 1 1/4 pounds) rhubarb, ends trimmed, cut crosswise into 1/2 inch piece
2 cups strawberries, quartered
1 cup sugar
2 tablespoons cornstarch
1/8 tsp salt

Crumble Topping

3/4 cup all-purpose flour
1/3 cup packed brown sugar
3 tablespoons granulated sugar
1 teaspoon cinnamon
1/8 teaspoon of salt
6 tablespoons cold unsalted butter, cut into small pieces

Directions

For the crumble topping – in a medium bowl, mix the flour, brown sugar, granulated sugar, cinnamon, and salt. Work in the butter with your hands, until large moist clumps form. Cover and chill until ready to use.
Preheat oven to 400 degrees with rack in lowest level. In a large bowl, toss rhubarb and strawberries with sugar, cornstarch, and salt. Pour into pie shell; sprinkle with Crumble Topping. Place pie on a foil-lined rimmed baking sheet.
Place pie in oven; reduce heat to 375 degrees. Bake until topping is browned and crust is lightly browned, about 1 1/2 hours. (If topping or crust begins to brown too quickly, cover with foil.) Cool completely before serving.

Sources: Adapted from: Very Culinary and Baking Illustrated

February 14, 2011

Iced Raspberry Souffle


Iced Raspberry Souffle

Happy Valentine’s Day!

Still looking for the perfect dessert for your sweetheart for tonight? Well, this souffle is tres’ chic and definitely hits the spot (and its so  light as well). I first saw this recipe during my ‘Take Home Chef’ phase…I’d watch every episode of that show on TLC and hope to run into that chef in my local grocery store…yeah, okay, I don’t think he ever came out to the midwest, but a girl can dream. The premise of that show was basically, this  awesome chef would pick some random person in a grocery store and pay for all their groceries and then come home with them and teach them to cook a fantastic meal. Pretty amazing.

Well, on one show, he made this iced raspberry souffle as the dessert, and I knew I just had to make it. It’s been my go-to Valentine’s Day dessert for the last several years because my husband absolutely loves it, and it’s really quite simple to make. The only problem I have with it is that raspberries are sometimes hit or miss at the grocery store here this time of year.

Anyways, enjoy and have a wonderful Valentine’s Day!

Iced Raspberry  Souffle

Ingredients

6 ounces fresh raspberries
3/4 cup  sugar
1 cup heavy whipping cream, semi-whipped
2 large egg whites
2 tablespoons powdered sugar
4 fresh raspberries, for garnish
Additional powdered sugar, for garnish

Directions

Cut four 14×3-inch/35×8-cm pieces of parchment paper. Wrap 1 paper strip around each of four 3/4-cup/175-ml soufflé dishes, forming collars that extend 1 inch/2.5 cm above the rims. Tape the ends to secure. Blitz the 6 ounces/170 g of raspberries and sugar in a blender until a puree forms.
Strain the puree through a fine-meshed sieve and into a large bowl, discarding the seeds in the strainer. Using a large rubber spatula, gently fold the semi-whipped cream into the raspberry puree.
In a separate large bowl, use an electric mixer to beat the egg whites and 2 tablespoons/20 g of powdered sugar until stiff peaks form. Gently fold the egg whites into the raspberry-cream mixture.
Pour the mixture into the soufflé dishes, dividing equally. Freeze for 3 hours or just until the raspberry mixture is frozen. Gently remove the parchment paper from the soufflés. Top each with a raspberry. Dust lightly with powdered sugar and serve!

Source: Take Home Chef

February 11, 2011

Oreo Truffles


Oreo Truffles

Friday…the most wonderful day of the week!

Okay, so I’m working both Saturday and Sunday this week, but for some reason, I still absolutely adore Fridays, and what better way to enjoy a Friday than with Oreo Truffles. These are, the original truffle…at least for me. They are the absolute first truffle I made and so, stand out in my mind as the best, most chocolaty and most romantic.

I felt compelled to post the picture in black and white just because it seemed more romantic and these truffles are definitely romantic (if you’re still searching for something to serve as dessert on Valentine’s Day). They take only about 15 minutes to make but absolutely taste gourmet.

To those of you celebrating Valentine’s Day this weekend like me, enjoy, and bon appetit!

Oreo Truffles

Ingredients

30 Oreo cookies, crushed
6oz cream cheese
2 (8 ounce) packages Semi-Sweet Baking Chocolate, melted
1 (6oz) package white baking chocolate

Directions

Combine crushed Oreos and cream cheese in the bowl of a stand mixer. Add cream cheese and mix until well blended.
Using a melon scoop, cookie scoop or your hands, create 1Tbsp sized balls.
Place balls on waxed paper and freeze for 15 minutes.
Melt the semisweet chocolate in a bowl over simmering water.
Dip truffles into semisweet chocolate.
Repeat chocolate melting with white chocolate.
Using a whisk, drizzle white chocolate over the truffles.
Refrigerate at least  1 hr.

Source: I have used this recipe for years and know it has been making its way around the internet so I’m really not sure where it originated from, but if you’re the original owner, please feel free to contact me so I can give credit where credit is due.

February 9, 2011

Peppermint White Chocolate Truffles


Peppermint White Chocolate Truffles

Okay, the first thought when I made these and took a picture of them was ‘don’t these little guys look like snowballs’? Maybe this is influenced by the snow apocalypse that we had last week.  Beautiful little snowballs covered in pink (and this is my friend Catherine’s description) “fairydust”. A perfect description for these truffles.

They’re beautiful and absolutely delicious. I’ve always been a huge fan of white chocolate…way more so than dark chocolate and the flavor combination of white chocolate and peppermint is perfect. The only disclaimer to this recipe is please please please make sure the ganache reaches room temperature before refrigerating it. Otherwise it absolutely positively will separate out. Otherwise, these are a cinch to make!

Peppermint White Chocolate Truffles

Ingredients

8 ounces white chocolate, chopped
2 tablespoons heavy cream
1 tablespoon corn syrup
1 teaspoon peppermint extract
1 tablespoon unsalted butter
20 peppermint candies, or 1/2 cup precrushed peppermints

Directions

Heat cream and corn syrup in a heat proof bowl over simmering water. Add chocolate, a little at a time, whisking to combine.
Remove from heat. Add the peppermint extract and the butter, stir slowly until combined.
Let the ganache sit until it reaches room temperature, then cover with plastic wrap and refrigerate for two hours. (Don’t skip the step of bringing the ganache to room temperature, or the butter may separate out !)
Put the peppermint candies in a plastic baggie and crush them with a kitchen mallet until they are in tiny pieces. Place in a small Pyrex dish or a ramekin.
Line a baking sheet with parchment. Using a melon baller or spoon, scoop small balls of ganache and roll in your hands to slightly warm the truffle. Dip in the crushed candy mixture and place on the baking sheet. Refrigerate until firm, about two hours.
Store in a covered container in the refrigerator up to one week. Remove 30-60 minutes before serving.
You can also freeze truffles for up to one month.

Source: My Madison Bistro

February 7, 2011

Gingerbread Truffles


Gingerbread Truffles


It’s the week before Valentine’s Day, and I’ve decided to dedicate this week of blogging to one of my favorite desserts: truffles. The truffle trend started years ago and I really don’t think that it has ever gotten ‘old’ (because seriously, who could get tired of these delicate, rich, chocolate bites of heaven?).

Through the years of making truffles, I’ve discovered so many wonderful truffle recipes and this year, have given boxes of homemade truffles as gifts to my family. The boxes included Gingerbread truffles (this post), Peppermint truffles (Wednesday’s post) and Oreo truffles (Friday’s post). They also included cookie dough truffles though I didn’t manage to get a good picture of them before they were devoured. Anyways, the point being, truffles would make a fabulous Valentine’s Day gift.

I know that gingerbread is normally thought of as a Christmas food, but as I was just discussing with one of my girlfriends in the ICU, who determines what’s normal or ethical or ‘right’? Of course, we weren’t talking about truffles, or gingerbread for that matter, but I think it still applies. Who decided that gingerbread should only be eaten between December 1st and 31st?

These truffles are chewy and have a ton of flavor in such tiny bites. In the original recipe, they were supposed to have nutmeg sprinkled on top, but I’m a bit of a chocolate junkie so I decided to just pour on the chocolate (dark on white) and they turned out fabulous.

Happy early Valentine’s Day! It’s going to be a sweet week!

Gingerbread Truffles

Ingredients

1/2 cup sugar
1/2 cup butter, softened
1/2 cup molasses
1 egg
1 teaspoon ginger
1 teaspoon cinnamon
1 teaspoon baking soda
1/2 teaspoon salt
1 1/2 cup flour
1/2 cup boiling water

For the coating

12oz white chocolate
1 8-oz. block cream cheese, at room temperature
6oz semisweet chocolate

Directions

Mix together the butter and sugar, then add the egg and molassess, mixing well.
In a separate bowl, combine the flour, spices, soda and salt, then add to wet mixture.
Stir to combine, then add the boiling water and mix. Pour batter into a greased 9×13 pan and bake at 350 degrees for 25-35 minutes or until springy. Let cool completely.
When cake is completely cooled, crumble into the bowl of a stand mixer and add in the cream cheese. Mix until the cake and cream cheese is totally combined.
Roll out into walnut-sized balls and place on a sheet pan lined with wax paper. Chill for 1 hour.
Melt the white chocolate in a bowl over simmering water stirring, until it is completely smooth.
Dip the balls in one at a time (I use two forks for this) and coat with the white chocolate. Set on a sheet of wax paper.
Melt semisweet chocolate in a bowl over simmering water in a similar fashion. Drizzle the darker chocolate over the truffles using a fork or whisk. Allow to harden completely. At this point you can serve immediately or freeze for later use.

Source: Adapted from: Sing for your Supper


Valentine's Day Gingerbread Truffles